 Cake decorating can be fun but it can also be a little stressful if you are not prepared or do not allow yourself enough time. I started getting into cake decorating for my nieces and nephews over the years and have learned to make sure I allow myself enough time so that I can take my time with the details and enjoy the process. If I rush, I tend to make mistakes or get a little sloppy and am unhappy with the final result. So... with my latest cake I decided to document my process and share with you all. This cake was for my nephew's 8th birthday and he is a HUGE hockey fan! Special Request: sports theme
 Step 1: Pick a theme/image you want to decorate. If it's your first try to keep it simple! What you decide will determine the shape and size of your cake. Here, I chose the Boston Bruins logo.
Step 2: Bake the cake and let cool.
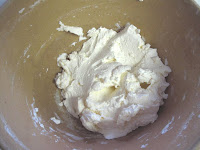
Step 3: Make frosting. My favorite frosting is this Italian Meringue Buttercream I found on Martha Stewart Recipes. It makes 4-1/2 cups which is more than enough to frost a cake. It's not the best option for decorating but it taste great (not too sugary) and works well. The photos below show the process of making this frosting, from making the syrup, beating egg whites, adding syrup to egg whites, and finally beating in butter and vanilla to finish frosting. The directions are pretty straightforward!


Step 4&5: Level cake (all layers) and frost. I wanted a white background so I added a few drops of white coloring gel to brighten the buttercream. Buttercream tends to have a buttery yellow tint to it. This is a double layer cake and I always add frosting between layers as well. The leveling will help keep the top of the cake flat. The layers do not have to be completely flat, but enough to remove the round bump in the center.


Step 6: Divide up remaining frosting and color. Depending on how many colors you will use, you'll need to divide up the frosting accordingly. For this cake, I have 2 colors: yellow and black. Now, this was my first time making black frosting or icing so I would like to share a little tip I learned. After dividing the frosting, I melted some dark chocolate and added it in (about 2 TBSP for about 1-2 cups of frosting). Then I used a black gel food coloring. The chocolate will help with getting a true black quicker without having to add too much coloring. Adding too much food coloring can alter the taste of the frosting. It is best to add the coloring in small portions and mix to see the results. Add more if necessary. Another tip ... while mixing the black color in, the frosting turned a silvery gray at first but in time (by the time I started the decorating) it darkened and turned black.
Step 7: Decorate! With the colors ready and pastry bags filled we are ready to start decorating (I like to have pastry bags ready for each color so there is no need to clean anything once the decorating starts). Depending on what you are going to decorate, it is best to have a plan on where to start and end. You can also use a knife to carve it out first to make sure the sizing is appropriate. Here, I started with the outside first, then the middle and then I filled in the rest.


Finishing touches ... filling in and the side of the cake. For the side of the cake, I filled it in by creating single layers around the cake, starting at the bottom (or you can start at the top) and working my way around and up to the top.


Step 8: Put candles on it and sing Happy Birthday!!!
 I have posted a few images of cakes I have made in my Flickr account: Cakes

